这是我们在Adobe After Effects中构建的动画,我们会把整个东西链接到一个网页上。当有人滚动页面时,动画将跟随他们滚动的位置。现在,我们将从最开始覆盖这个,所以如果你以前从未使用过After Effects,我们将覆盖所有你需要知道开始。还有六件事,我们会在After Effects中设置我们的合成,我们会构建动画,我们会导出它,我们会把它引入Webflow并放到我们的布局中,我们会配置一个触发器,这是跟踪页面上滚动位置的,最后我们会把我们的动画链接到那个触发器。
打开After Effects,打开After Effects打开After Effects。这是第一步。除了它不是。让我们继续。在After Effects中设置构图时需要考虑的是,这是起点,但你总是可以在之后进行更改。你可以改变尺寸,你可以改变时间,帧率,但在这个例子中,让我们选择1000 * 1000。帧率对于这样的连续动画并不太重要,让我们选择60帧,这样我们就可以近似它在普通浏览器上的样子。持续时间也一样,不是临界,我们可以用任何东西。最后,让我们设置背景色为黑色。当我们点击ok时,一切都准备好了。 If we want to go back and make a change, we can right-click on our composition, and access the settings. Let’s change our background color to white since this more closely matches the design we’re going for. That’s step one.
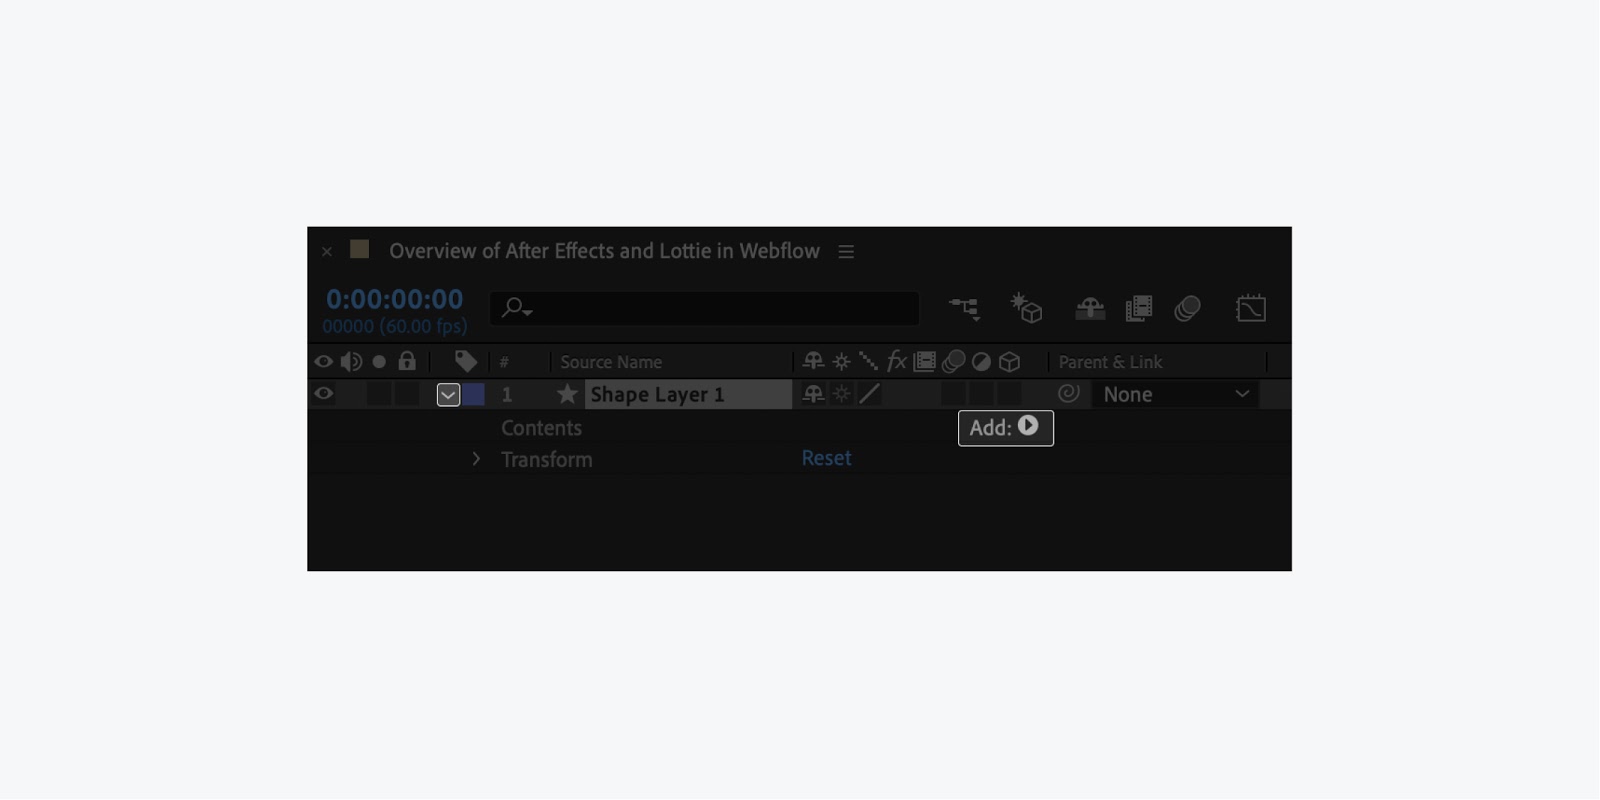
第二步才是真正有趣的地方。让我们先为这个动画创建外轨道路径。现在,我们将分几个不同的阶段来构建它。在我们设置好合成中的所有东西之前,我们不会进行动画。为了做到这一点,让我们先调整缩放。我们要把尺寸调整到200%,在下面这里,也就是通常出现图层的地方,右键单击,新建,形状图层。用这个,我们可以做出任何我们想要的形状。如果我们现在预览会怎么样?如果我们点击播放?没什么。 We can’t see anything because we haven’t defined what that shape is. So let’s open up using this arrow, and we’ll go to Add, from Add, we’ll select Ellipse. And now we have an ellipse shape, but if we hit play again, nothing. We have to define either a stroke or a fill or something else for this path. So let’s go to Add for a second time, let’s do a Stroke, and if we go to preview now, still absolutely nothing. Except there is, we just can’t see it, that’s because the stroke color is white. Let’s change the stroke color to a light grey. And if we hit play, we can see exactly what’s going on. Okay, let’s make our stroke one pixel so it’s really thin. And we’ll go to the ellipse path, we can put the arrow next to that, and adjust the size. This is going to be our outer orbital path, for our outermost planet. So we’re going to bring this almost all the way to the edge. That’s our outer orbital path, and if we click on the layer here and hit return we can call it Orbital Path. This way we can keep things organized. And also, for a stylized look, let’s add one more thing. Let’s add a fill. And we’ll choose the fill color here, make it black, and we can actually open up fill here to affect opacity. And we’ll drop the opacity all the way down to maybe 3 percent. That looks pretty good.
这是第一个轨道。现在我们已经创建了一个,我们可以复制粘贴。粘贴第二个,我们要做的就是进入Contents,选择椭圆路径,调整它的大小。把这个放进去一点。现在,为什么我们要调整椭圆路径本身的大小而不是进入变换,影响缩放之类的东西呢?我们这样做的原因是,我们不需要画的笔画,我们在椭圆周围画的笔画,如果我们变换,如果我们把所有的东西都缩小,那一个像素的笔画也会缩小。我们想要一个一致的描边,所以我们在这里使用椭圆路径大小属性。我们把它画得小一点,我们的外轨道,和下一个轨道之间的距离要大一点。看起来不错。再复制粘贴一次,到这里,选择内容,椭圆路径,调整大小。 Same thing for the next planet, just copy and paste, bring this one in a little bit more. Contents, Ellipse Path, Size. And, we’ll speed this part up now in post so you don’t have to sit through every manual adjustment. And, that’s it. Seven orbital paths, that means we’ll have seven different planets. Let’s command A or control A on PC to select all, and then we can just hit the arrow here to collapse all of them. We have seven orbital paths, each of them representing the path a planet will take as it rotates around that star.
说到星星,让我们创建一个星星。而不是从头开始,让我们用轨道7作为模板。复制粘贴,打开,我们在这里做一些修改。对于内容部分,我们像处理其他部分一样把它缩小很多。这就是恒星本身。我们把它放在正中间。我们点标签,然后回车,星号。让我们放大,看看我们在做什么,让我们到800%。我们在这里使用相同的描边颜色,但我们想让填充有点不同。实际上,我们想要填充本身,我们选择一种白色,我们想让填充本身的不透明度为100%。 So if we zoom out, you can see the star right at the center. That looks pretty good. So that’s our star. Let’s collapse that, and we’ll use the same type of design for our planets, but there’s a little bit of a difference with the planets. Let’s copy and paste. We’ll call this one, hit return, planet. And for our planet, we’re going to go into Contents, and we’ll adjust two things for each planet. The first thing we’ll adjust is the size, we don’t want it as large, so let’s make this one, let’s say 15. But we’ll also adjust it’s position, so for now, let’s just move this position right here on top of the first orbital path. Let go. Let’s click out. That looks pretty good. We want it just balanced right on that orbital path. Just copy and paste for the second planet, let’s go in, Contents, and we’re going to randomize the size a little bit. Maybe this one will be 20, and update it’s position to go right over here. Now that might be a little close to the third orbital path, so let’s make it something like 18, click out, that looks pretty good. So copy and paste, planet three. Again we’re going to speed this up in post so you don’t have to sit through each planet.
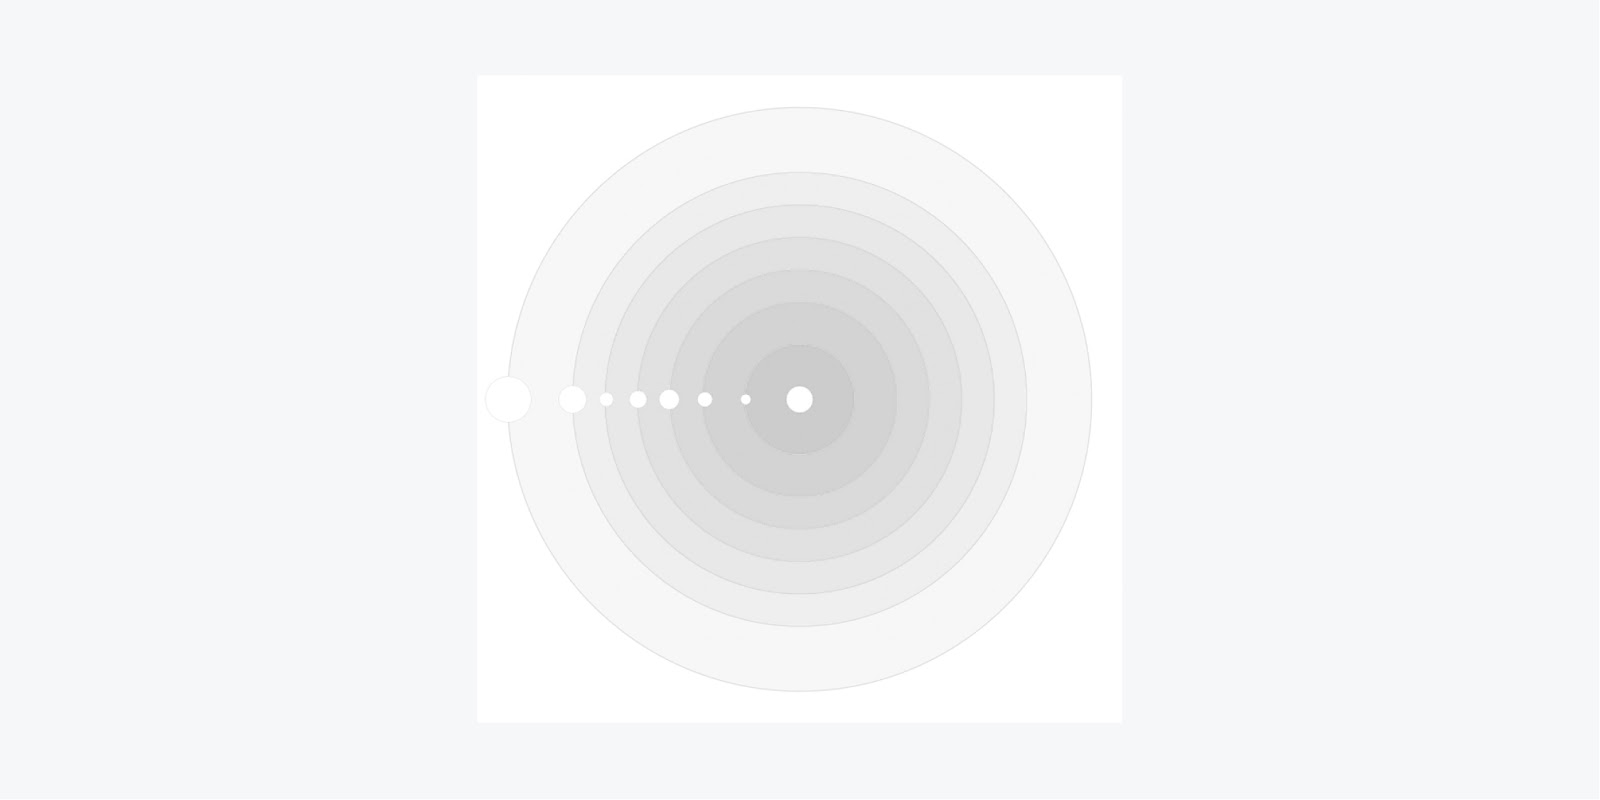
这就是我们的七颗行星。现在所有东西都按需要放置好了,让我们谈谈锚点。我们在内容中使用位置的原因是,锚点,也就是在这里的中心,那个小准星,锚点是所有东西都将从它开始旋转的点。如果我们调整旋转,我们从7号行星开始,如果我们打开变换,调整旋转,我们会看到它实际上是绕恒星运行的,让我们把它调整到200%,它绕恒星运行。因为锚点是中心,这是所有物体围绕的点。现在,如果我们要移动整个图层,让我们影响整个图层的位置,让我们把它移动到这里,你可以看到锚点在改变位置2。现在如果我们以移动的锚点旋转,那就是所有物体围绕的新位置。让我们命令Z并撤销几次,这样我们就可以回到锚点。看起来不错。现在请注意,当我们抓住播放头,左右左右移动时,没有任何动画。 We want to create keyframes for that to happen. And the way we can do that is going to the first frame here, frame zero, we’re going to click on the stopwatch next to rotation. So that’s going to create our first keyframe, you can see that keyframe right there, was automatically created, this still isn’t animated yet, but we basically set that first point. That first keyframe is indicating that that rotation is in 113 degrees. What happens if we move the playhead all the way to the end to the last frame and we affect our rotation? Let’s crank that up to maybe 275 degrees. So if we do that, and then grab our playhead and move left and right, we can see the planet is in orbit around that anchor point. So that looks pretty good for planet seven. We might want planet seven to orbit even more, so if we go above 360, we can see right here where it says rotation, once we hit 360, it actually changes to one revolution plus 0 degrees. Because, after 360 it’s done one full revolution so this is now one full revolution plus 77 degrees and so on. Let’s edit right there, and take a look at that outer planetary orbit. That looks pretty good. Okay, that’s planet seven. Let’s do planet six. We’ll go into transform, and we’ll affect it’s starting rotation point and do we want it to start over here, and we’ll add our first keyframe by clicking on the stopwatch, go to the end, and we’ll rotate. Test that out; looks pretty good. Now, you might not be able to see because of the zoom level and the contrast, you might not be able to see each of these orbital paths as we’re previewing them so it can help to keep the planet you’re working with selected, or it could help to change our composition settings. We could just choose a different background color for right now. Let’s change the background color to black, let’s hit okay. Now we can see a little better what’s going on. So if we click out, we can take a look at our orbital paths, the planets orbiting around that star, that’s two planets. Now we’re going to speed up again and do the other five.
看起来不错。我们可以继续调整,如果我们愿意,但让我们按空格键从第一帧预览动画将是什么样子。好的,让我们把背景颜色改回来。进入合成设置,我们将选择白色背景,因为这是我们最终将使用的布局,当我们将它集成到网页。让我们回到开头,看看那里。看起来不错。我们可以从这里开始。现在,After Effects,就像Photoshop,或Cinema 4D,或DaVinci Resolve,这些都是应用程序,有大量的选项。使用它们的方式没有对错之分,这是一个重要的考虑因素。你可能知道,或者你可能会发现一种完全不同的方法来建造它,这是一件很美好的事情。
第三步,我们已经构建了动画,导出它。现在,我们使用一个名为Bodymovin的插件来获取After Effects组合,并将其转换为单个JSON文件。我们可以在窗口,扩展,身体移动中找到它。我们有一个单独的视频,展示了如何安装Bodymovin扩展,如果你还没有检查出来。我们要确保合成是被选中的,我们要设置一个目标文件夹,这是导出保存文件的地方。完成后,按渲染。就是这样。这是第三步。
第四步,让我们将导出的文件导入Webflow。我们在这里有一个并排的布局,我们在网格中构建。如果你之前没有在Webflow上建过网站,我们有大量的教学资源、视频、文章,所有这些都在Webflow大学上,而且都是免费的。如果你还没看过的话,去看看吧。但我们只是将动画拖到网格的左侧。而且,如果我们把这个网站按原样发布,它实际上是可以运行的。它在上面,但它是有动画的。我们会先修复布局,但之后我们会确保将这个动画绑定到滚动位置,而不是在页面加载时自动播放。好的。退出预览模式。 And to position this so it’s vertically centered, we’re going to use a trick. We’ll use a div block, a div, which is just a box. And we can drag the div block into our grid right here. And once we do, we can put our Lottie animation, the thing we exported from After Effects, right inside that div block. And if we preview now, it’s exactly the same. Out of preview. It didn’t change anything because we haven’t told the div block how to behave. Let’s set a type to 100 percent of the viewport, that’s 100 VH, and we’re almost there just a few more changes. We’re going to enable flexbox. This let’s us align and justify content to the center. So let’s align and justify cont- and it’s done. Regardless of the size of our viewport, this animation will be at the vertical center. Magic? Not at all, because we just demonstrated exactly how it’s done.
现在,还有一件事。如果我们滚动,动画会停留在顶部。它会滚动所有的标题和段落,甚至是假按钮,但如果我们让div块,我们创建的那个div块,如果我们让它具有粘性呢?如果我们确保它从0像素处开始。所以它会立刻粘住。让我们尝试在预览模式,而我们滚动,动画是保持在完美的中心整个时间。这是第四步。
第五步,我们差不多完成了。这是最重要的部分。我们要设置一个基于滚动的触发器。在交互过程中,我们会添加一个触发器。触发器有两种类型。触发器就是动画被触发的事件,因为没有不同的术语。如果你想让动画在你点击某个东西时启动,点击那个东西,那就是触发器。如果你想让动画在页面加载时开始,页面本身加载,这是触发器。在本例中,我们希望触发器位于页面上。我们想让这个动画在我们滚动整个页面时进行,所以我们选择这个选项。
我们快算出来了。这是最后一部分。我们想为此创建一个新的动画。当我们滚动时,我们希望我们的After Effects动画动画。这里有两部分。当我们在页面顶部的时候是0%,当我们滚动到页面底部的时候是100%。我们要确保我们的Lottie动画,行星,我们要确保它被选中。我们会简单地添加一个关键帧,一个动作,来控制我们的回放。结果出现了两件事。一个在0,另一个在100。 At 0, we’re basically at the beginning of the animation. At 100, let’s go in, and make sure we’re at the end of our animation. Too easy? We’ll see. And let’s go into preview mode. And as we scroll, it works exactly as expected.
但是,就是这样。我们设置After Effects合成,我们动画,我们导出,我们添加我们的动画到Webflow,我们配置触发器,最后我们设置我们的动画,使它与我们在页面上滚动的位置相关联。现在,你可以用它做数以万亿计的事情。我们在Webflow大学上有完整的课程,但那只是Webflow设计器中一个基于滚动的基础动画。